Santa Coaster Set Crochet Pattern (Free Step-by-Step Tutorial)
Easy–intermediate · DK yarn · 3.5 mm hook · US terms · A Cozy Nook Daily original pattern
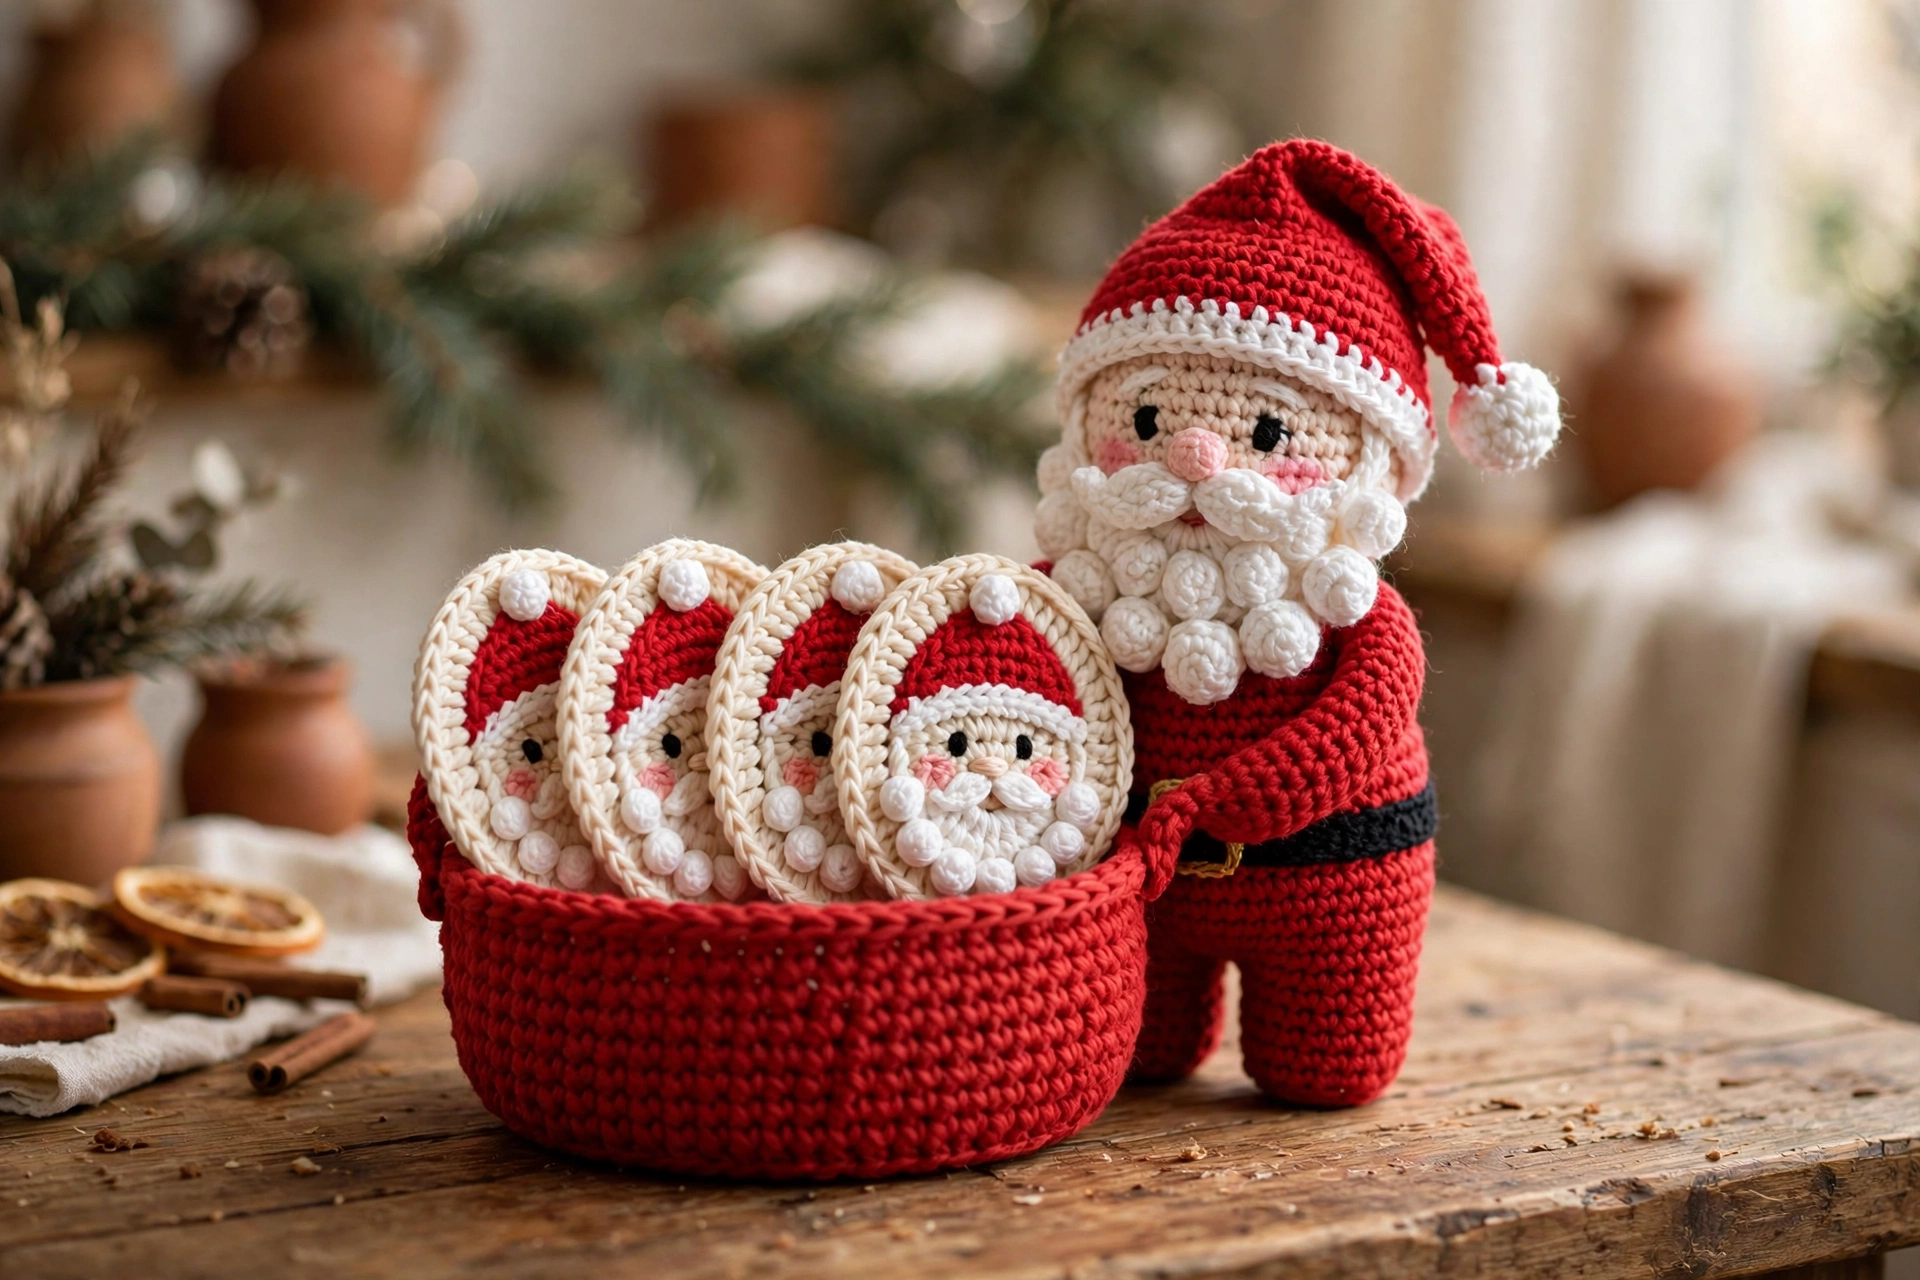
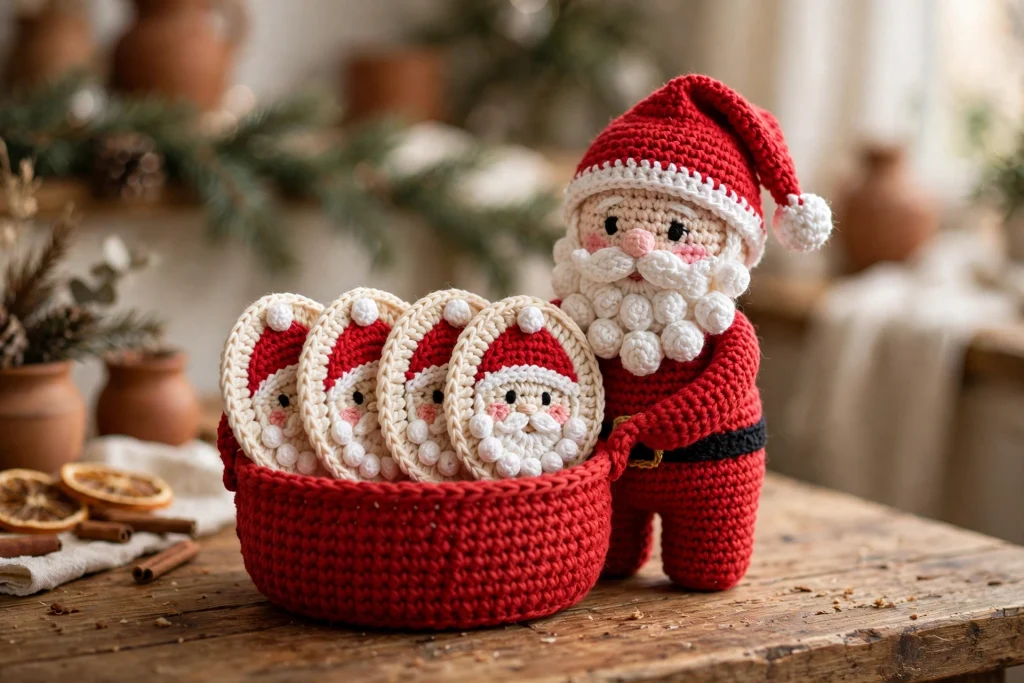
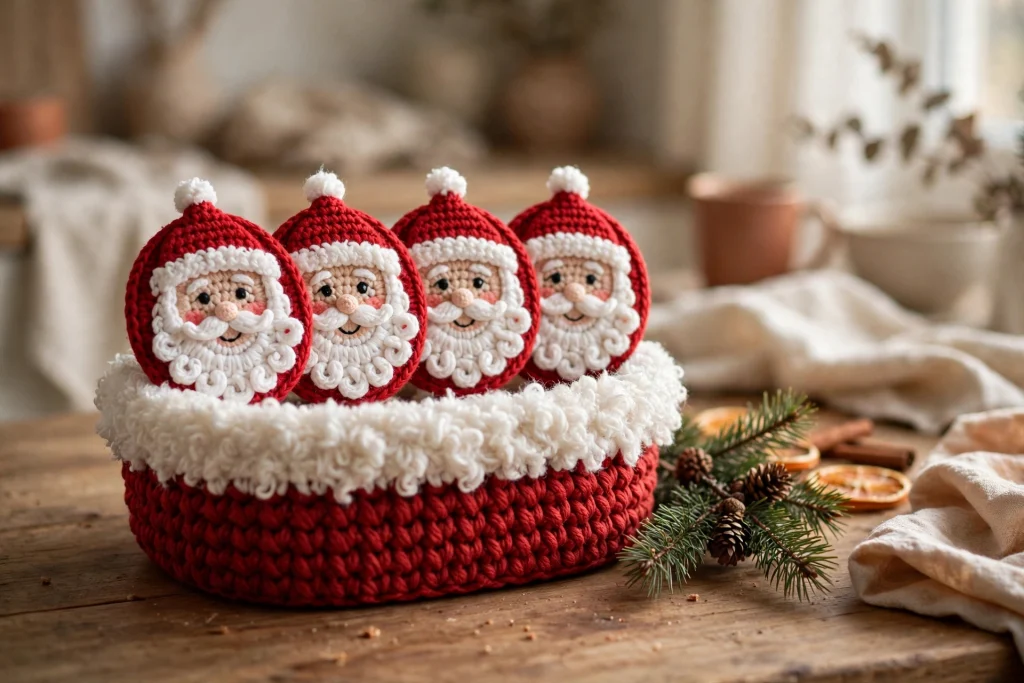
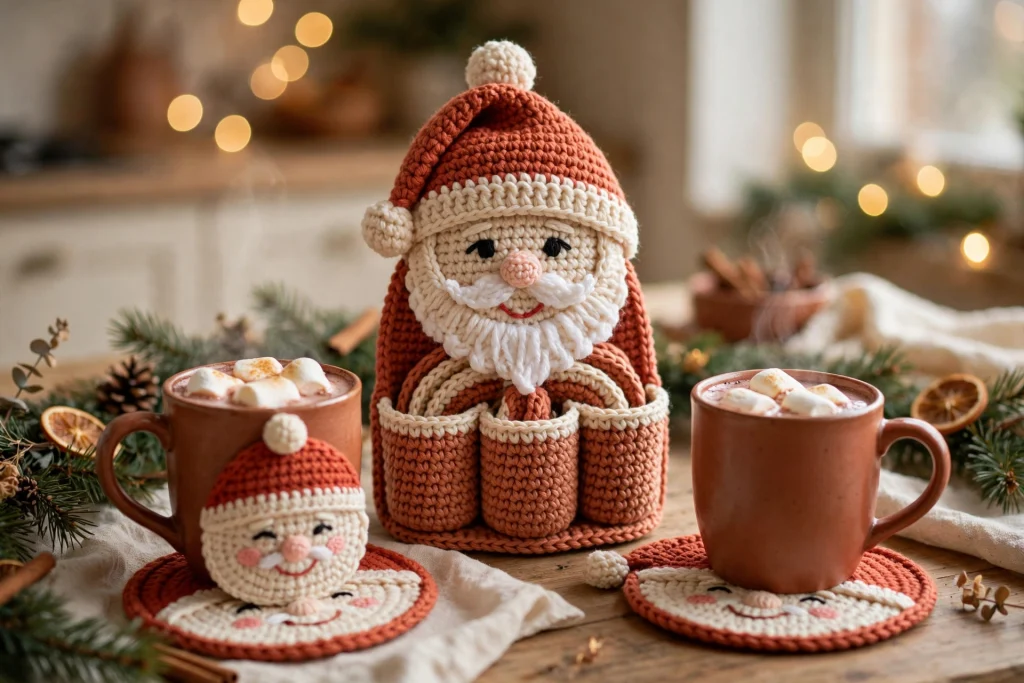
Some Christmas makes are just decorations. This one earns its place on the table. Our santa coaster set crochet pattern gives you a standing Santa who holds four Santa-face coasters in his own little basket — a centrepiece, a coaster holder and a handmade gift all in one. Every round is written out with its stitch count, so you can follow along stitch by stitch and check your work as you go.
The set is built in four parts: the coasters first (they teach you every technique you need), then the basket, then Santa himself, then a simple assembly order so nothing twists and every knot hides between layers. Allow a weekend for the full set — or make just the coasters first and add Santa later.
Finished sizes
- Santa: approx. 21 cm (8.25 in) tall
- Basket: approx. 12.4 cm (4.9 in) across, 6.3 cm (2.5 in) high
- Coasters: approx. 11.5 cm (4.5 in) across, set of 4
Gauge: 20 sts × 22 rows = 10 cm (4 in) in single crochet, DK yarn, 3.5 mm hook. Gauge matters in this set — the basket has to fit the coasters, and Santa’s proportions come straight from these counts. If your swatch has too many stitches, go up a hook size; too few, go down.
Materials
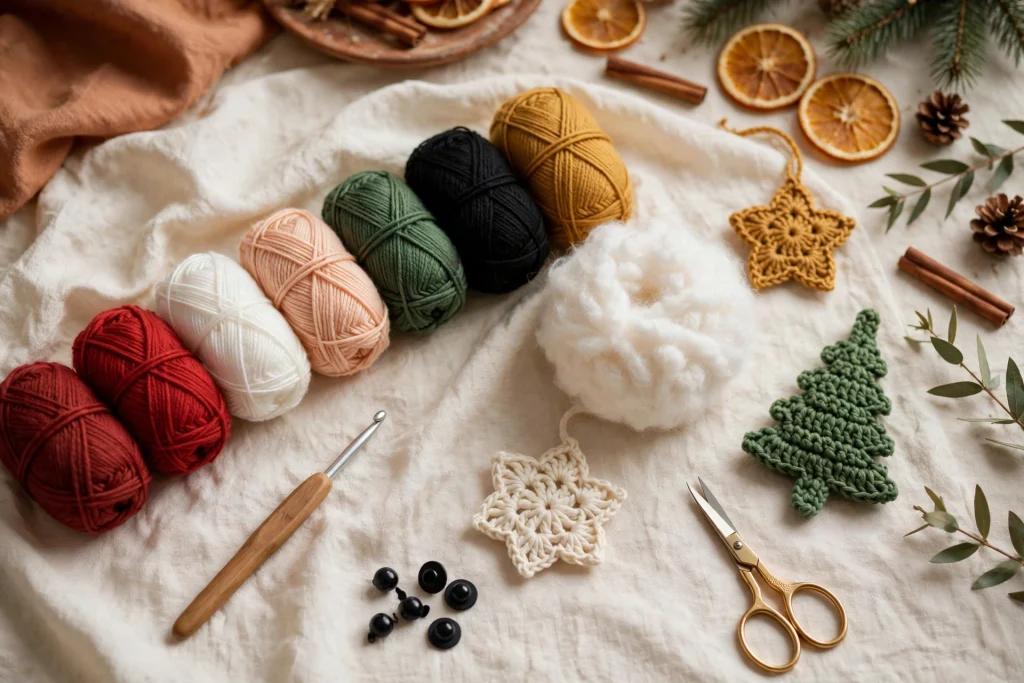
- DK yarn (approx. 260 m per 100 g): Red 150 g, White 100 g, Skin (soft peach) 60 g, Black 25 g, Green 20 g, Gold 10 g
- White fluffy or faux-fur yarn, approx. 30 g, for the brims and basket rim
- 3.5 mm crochet hook
- Fiberfill stuffing, approx. 120 g
- 1 pair of 9 mm safety eyes (for Santa)
- 8 × 6 mm black beads, or black embroidery thread for French-knot eyes (for the coasters)
- Yarn needle, embroidery needle, stitch markers, pins, scissors, measuring tape
- Optional: a plastic-canvas disc, approx. 11.5 cm across, to firm the basket base
- Optional: blocking mat and rustproof pins
Safety note: safety eyes and beads are small parts. This set is a decoration, not a toy — keep it away from babies, young children and pets, and embroider the eyes instead if little hands will touch it.
Abbreviations (US terms)
- ch — chain · sc — single crochet · inc — increase (2 sc in one stitch) · dec — invisible decrease · sl st — slip stitch · MR — magic ring · BLO — back loop only · st(s) — stitch(es)
- Bobble: (yarn over, insert hook in the stitch, yarn over, pull up a loop, yarn over, pull through 2 loops) 4 times in the same stitch, yarn over, pull through all 5 loops on the hook. Push the bobble to the front of the work with your thumb as you complete the next stitch.
How the rounds work: everything round is worked in a continuous spiral unless a piece says otherwise — mark the first stitch of every round and move the marker up as you go. To change colour in a spiral, fasten off the old colour at the end of the round, join the new colour with a sl st in the first stitch, and keep spiralling.
Part 1 — The four Santa-face coasters
Make every piece four times. Two coasters get green backings and two get red, so the set looks festive from every angle.
Backing disc — make 4 (2 green, 2 red)
Round 1: MR, 6 sc. (6)
Round 2: Inc in each st around. (12)
Round 3: (1 sc, inc) × 6. (18)
Round 4: (2 sc, inc) × 6. (24)
Round 5: (3 sc, inc) × 6. (30)
Round 6: (4 sc, inc) × 6. (36)
Round 7: (5 sc, inc) × 6. (42)
Round 8: (6 sc, inc) × 6. (48)
Round 9: (7 sc, inc) × 6. (54)
Round 10: (8 sc, inc) × 6. (60)
Round 11: (9 sc, inc) × 6. (66)
Round 12: (10 sc, inc) × 6. (72)
Measure: approx. 11.5 cm (4.5 in) across. All four backings must match.
Face disc — make 4 (skin)
Work exactly like the backing disc, but stop at Round 10.
Rounds 1–10: MR, 6 sc; inc around (12); then (1 sc, inc), (2 sc, inc), (3 sc, inc), (4 sc, inc), (5 sc, inc), (6 sc, inc), (7 sc, inc), (8 sc, inc) — each repeated 6 times. (60)
Measure: approx. 9.5 cm (3.75 in) across.
Beard — make 4 (white, worked flat)
The starting ch-1 never counts as a stitch.
Row 1: 3 sc into a MR. Ch 1, turn. (3)
Row 2: Inc in each st across. Ch 1, turn. (6)
Row 3: (1 sc, inc) × 3. Ch 1, turn. (9)
Row 4: (2 sc, inc) × 3. Ch 1, turn. (12)
Row 5: (3 sc, inc) × 3. Ch 1, turn. (15)
Row 6: (4 sc, inc) × 3. Ch 1, turn. (18)
Row 7: (5 sc, inc) × 3. Ch 1, turn. (21)
Row 8: (6 sc, inc) × 3. Ch 1, turn. (24)
Row 9: (7 sc, inc) × 3. Ch 1, turn. (27)
Row 10 (edging): Turn the piece so the curved edge faces you. Ch 1. Work sc in each of the 27 sts along the curved edge, working a bobble instead of a sc in every 3rd st. Fasten off, leaving a 30 cm tail for sewing. (27)
Measure: approx. 8 cm (3.25 in) across the flat edge.
Hat, brim and pom-pom — make 4
Hat (red, worked flat): rows exactly like the beard, but stop at Row 7 — 3 sc in a MR, then inc rows (6, 9, 12, 15, 18) ending at (5 sc, inc) × 3. (21) Measure: approx. 6.3 cm (2.5 in) across the flat edge.
Brim (fluffy white): Ch 13. Row 1: sc in the 2nd ch from the hook and in each ch across. Ch 1, turn. (12) Row 2: sc in each st across. (12) The brim should match the hat’s flat edge.
Pom-pom (white): Round 1: MR, 6 sc. (6) Round 2: inc in each st around. (12) Round 3: sc in each st around. (12) Round 4: dec in each st around. (6) Stuff with a pinch of fiberfill before closing.
Nose — make 4 (skin)
Round 1: MR, 6 sc. (6)
Round 2: Inc in each st around. (12)
Round 3: Sc in each st around. (12) Fasten off, leaving a sewing tail. Approx. 2.4 cm (1 in) across.
Dressing the face
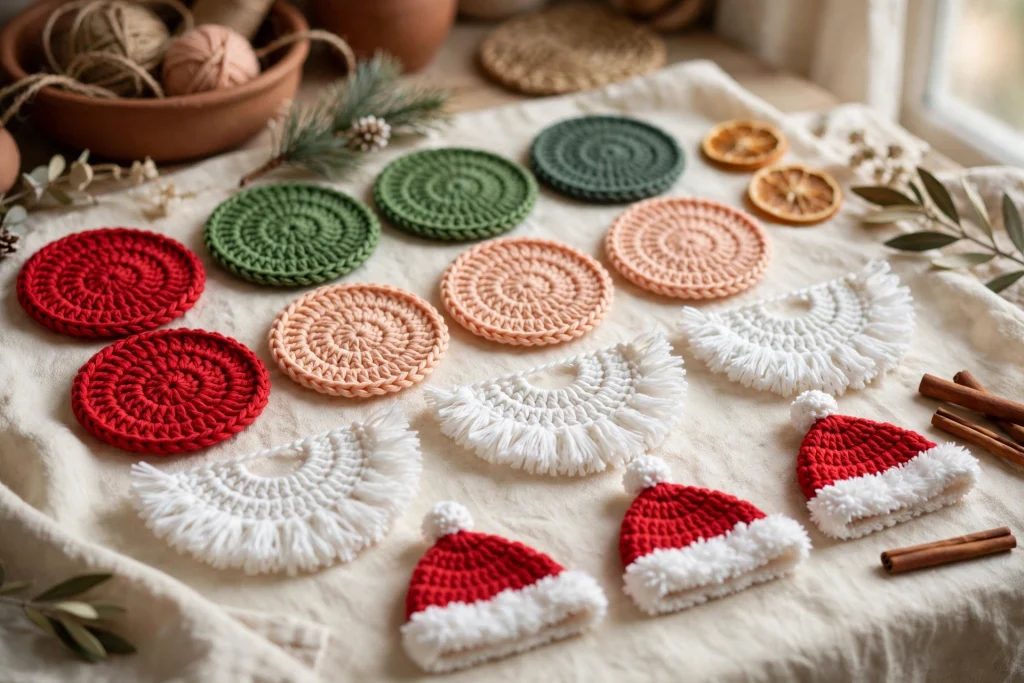
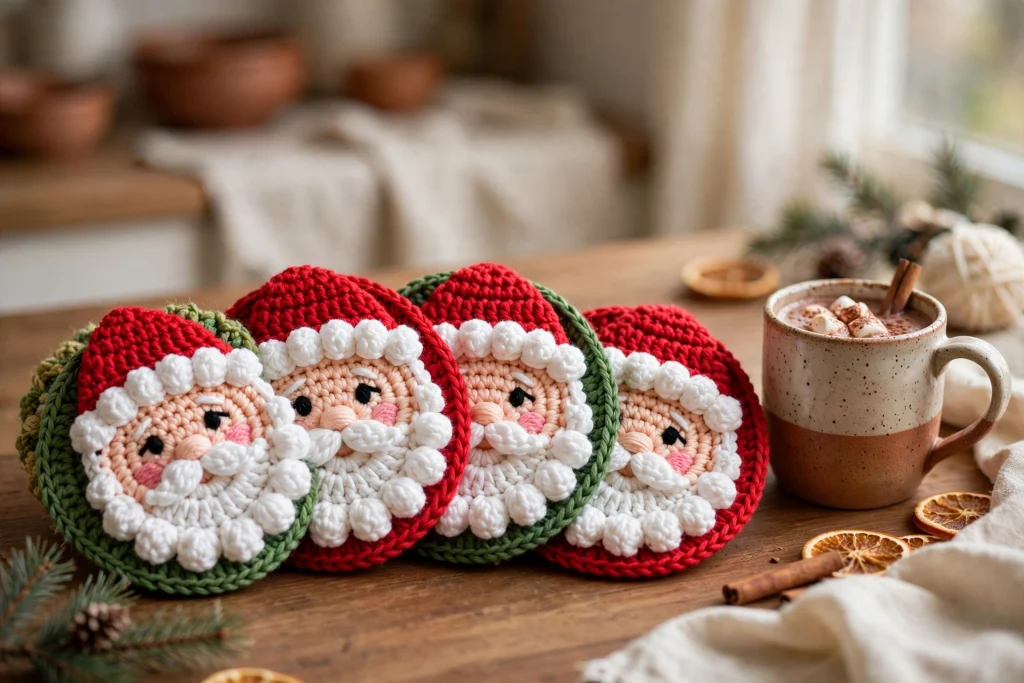
Dress each face before joining it to its backing, so every knot and tail ends up hidden between the layers. Sew the beard first: centre its flat edge about 1 cm below the centre of the face and stitch along the flat edge and the curve. Sew the hat above it, flat edge straight across the top of the face with the ends curving slightly down at the sides. Sew the fluffy brim strip over the hat’s flat edge, and the pom-pom ball at one top corner of the hat. Sew the nose in the centre, sitting on the beard’s top edge. Add the eyes last: one 6 mm black bead (or a French knot) on each side of the nose, approx. 1.5 cm apart and 1 cm above it.
Joining the coaster
Centre the dressed face on a backing disc, wrong sides together, and pin at four points. Whipstitch around the edge through both layers with yarn matching the backing, keeping the stitches small and even. Hide the final knot between the layers and bury the tail. Check the coaster measures approx. 11.5 cm and lies flat — if it cups, pin it to a blocking mat, mist lightly and leave to dry. Repeat for all four.
Part 2 — The basket
The basket is one piece: a flat base that turns into upright sides with a single back-loop round.
Rounds 1–13 (base, red): MR, 6 sc; inc around (12); then (1 sc, inc) through (11 sc, inc), each repeated 6 times. (78) Checkpoint: the flat base measures approx. 12.4 cm (4.9 in) across. If you are using the plastic-canvas disc, it sits inside the base now.
Round 14: Working in BLO, sc in each st around. (78) — this round turns the base into walls.
Rounds 15–25: Sc in each st around. (78)
Rounds 26–27: Change to white fluffy yarn. Sc in each st around. (78) Fasten off and weave in the end.
Measure: base approx. 12.4 cm across; finished height approx. 6.3 cm (2.5 in).
Part 3 — Santa
Torso with belt (red and black)
Rounds 1–8: MR, 6 sc; inc around (12); then (1 sc, inc) through (6 sc, inc), each repeated 6 times. (48)
Rounds 9–12: Sc in each st around. (48)
Rounds 13–17 (belt): Change to black. Sc in each st around. (48)
Round 18: Change to red. (6 sc, dec) × 6. (42)
Rounds 19–20: Sc in each st around. (42)
Round 21: (5 sc, dec) × 6. (36)
Round 22: Sc in each st around. (36) Stuff firmly before the top closes. Widest point approx. 7.6 cm (3 in).
Belt buckle (gold and black): Gold frame — Ch 9. Row 1: sc in the 2nd ch from the hook and in each ch across. Ch 1, turn. (8) Row 2: sc in each st across. (8) Black centre — Ch 6. Row 1: sc in the 2nd ch from the hook and in each ch across. (5) Sew the centre onto the frame; the finished buckle is approx. 4 cm (1.6 in) wide.
Head (skin)
Rounds 1–7: MR, 6 sc; inc around (12); then (1 sc, inc) through (5 sc, inc), each repeated 6 times. (42)
Rounds 8–12: Sc in each st around. (42) Insert the two 9 mm safety eyes after Round 10 and press the washers on firmly from inside, before stuffing.
Round 13: (5 sc, dec) × 6. (36)
Round 14: (4 sc, dec) × 6. (30)
Round 15: (3 sc, dec) × 6. (24)
Round 16: (2 sc, dec) × 6. (18)
Round 17: (1 sc, dec) × 6. (12)
Round 18: Dec in each st around. (6) Stuff firmly from Round 15. Approx. 6.7 cm (2.6 in) across.
Nose (skin): Round 1: MR, 6 sc. (6) Round 2: inc in each st around. (12) Round 3: sc in each st around. (12) Round 4: (1 sc, dec) × 4. (8) Stuff with a tiny pinch of fiberfill before the last round.
Beard panel (white, worked flat)
Bobble rows alternate with decrease rows as the panel tapers — this is the texture that makes Santa.
Row 1: Ch 19. Sc in the 2nd ch from the hook and in each ch across. Ch 1, turn. (18)
Row 2: Dec, sc in the next 14 sts, dec. Ch 1, turn. (16)
Row 3: (Sc in the first st, bobble in the next st) repeated across. Ch 1, turn. (16)
Row 4: Dec, sc in the next 12 sts, dec. Ch 1, turn. (14)
Row 5: Bobble row, as Row 3. (14)
Row 6: Dec, sc in the next 10 sts, dec. Ch 1, turn. (12)
Row 7: Bobble row. (12)
Row 8: Dec, sc in the next 8 sts, dec. Ch 1, turn. (10)
Row 9: Bobble row. (10)
Row 10: Dec, sc in the next 6 sts, dec. Ch 1, turn. (8)
Measure: top edge approx. 9 cm (3.5 in) wide, length approx. 4.5 cm (1.75 in).
Moustache — make 2: Ch 6. Bobble in the 3rd ch from the hook, sc in the next ch, bobble in the next ch, sl st in the last ch. Fasten off, leaving a sewing tail. (4) Each half is approx. 2.5 cm (1 in) long.
Hat (red, fluffy brim)
Worked top-down from the tip, in a spiral.
Round 1: MR, 6 sc. (6)
Round 2: Inc in each st around. (12)
Round 3: Sc in each st around. (12)
Then alternate one increase round with one plain round: (3 sc, inc) × 3 (15), sc round; (4 sc, inc) × 3 (18), sc round; (5 sc, inc) × 3 (21), sc round; (6 sc, inc) × 3 (24), sc round; (7 sc, inc) × 3 (27), sc round; (8 sc, inc) × 3 (30), sc round; (9 sc, inc) × 3 (33), sc round; (10 sc, inc) × 3 (36), sc round; (11 sc, inc) × 3 (39), sc round; (12 sc, inc) × 3 (42), then one final sc round. (42)
Last 2 rounds: Change to white fluffy yarn. Sc in each st around, twice. (42) Fasten off. Length tip to brim approx. 11 cm (4.3 in) before folding; the opening must slip over the head.
Hat pom-pom (white): MR, 6 sc (6); inc around (12); (1 sc, inc) × 6 (18); sc round (18); (1 sc, dec) × 6 (12); dec around (6). Stuff lightly before closing.
Arms — make 2 (red, fluffy cuff, skin hand)
Round 1: MR, 6 sc. (6)
Round 2: Inc in each st around. (12)
Rounds 3–7: Sc in each st around. (12)
Round 8: Change to white fluffy yarn. Sc in each st around. (12)
Rounds 9–10: Change to skin. Sc in each st around. (12)
Round 11: (1 sc, dec) × 4. (8) Stuff only the hand end, very lightly. Length approx. 5 cm (2 in). Make the second arm exactly the same.
Boots — make 2 (black)
Round 1: MR, 6 sc. (6)
Round 2: Inc in each st around. (12)
Rounds 3–4: Sc in each st around. (12)
Round 5: (1 sc, dec) × 4. (8) Stuff lightly.
Part 4 — Putting Santa together
Work through these in order, and pin every piece before you sew it.
- Head to torso: centre the head on the torso’s top edge, face forward — the nose line must sit directly above the belt. Whipstitch around the join with skin yarn, adding a little extra stuffing to the neck as you close. Hide the knot at the back.
- Nose and eyebrows: sew the nose in the centre of the face, between and slightly below the eyes. With white yarn, embroider two small curved eyebrow stitches above the eyes.
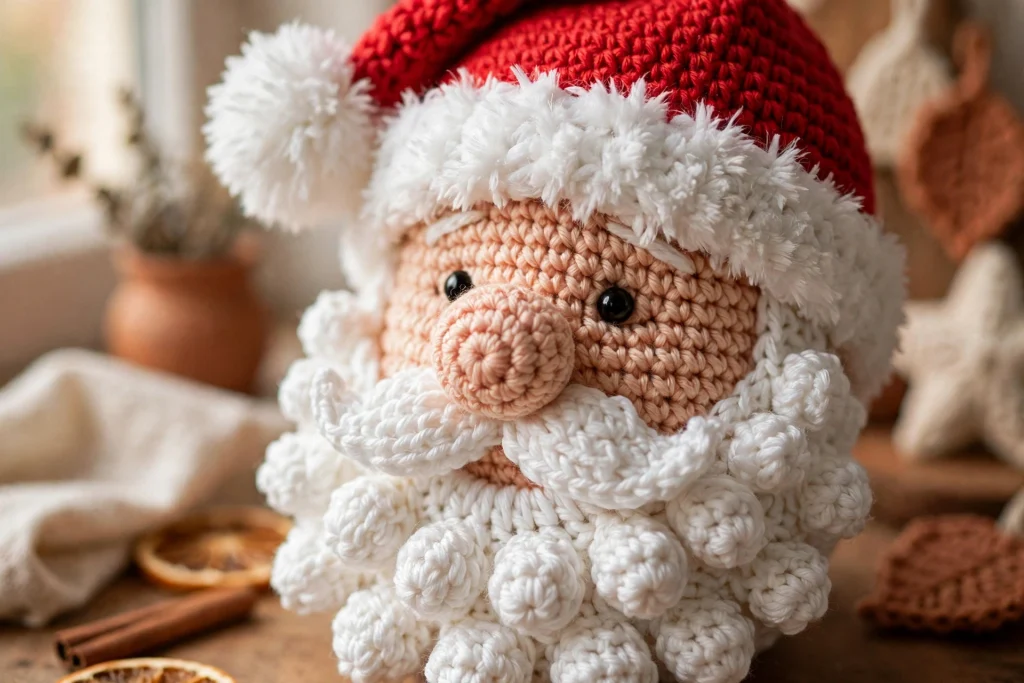
- Beard panel: pin it so its top edge tucks under the nose and the sides curve around the jaw. Sew along the top edge first, then down both sides. The tapered end should hang centred over the belt.
- Moustache: sew the two halves just above the beard’s top edge, angled slightly downward and meeting at the centre under the nose.
- Hat: fold the cone tip forward approx. 4 cm and tack it with two stitches. Pull the hat on so the fluffy brim sits over the top of the beard’s sides, sew the brim to the head at four points, and sew the pom-pom to the folded tip.
- Arms: sew one at each side of the torso, just below the head join, angled forward and down so the hands rest at basket-rim height. Check both arms are level before finishing the knots.
- Boots: sew at the front of the torso base, approx. 2 cm apart, toes pointing forward.
- Buckle: sew the gold frame in the centre of the black belt, with the black centre piece in its middle. Bury all knots inside the torso.
- Basket: set it centrally in front of Santa, touching the torso, seam at the back, so his hands rest on the rim. Leave it free-standing, or tack it to the torso with three stitches on each side.
- Load and check: stand the four coasters upright in the basket, faces forward. Final check: buckle centred, nose centred over the buckle, basket seam hidden at the back, hat fold falling forward.
- Pull test: gently pull every sewn part — beard, moustache, hat, pom-pom, arms, boots, buckle and every coaster feature. Re-sew anything that moves, then fluff the bobble beard and trims with your fingers.
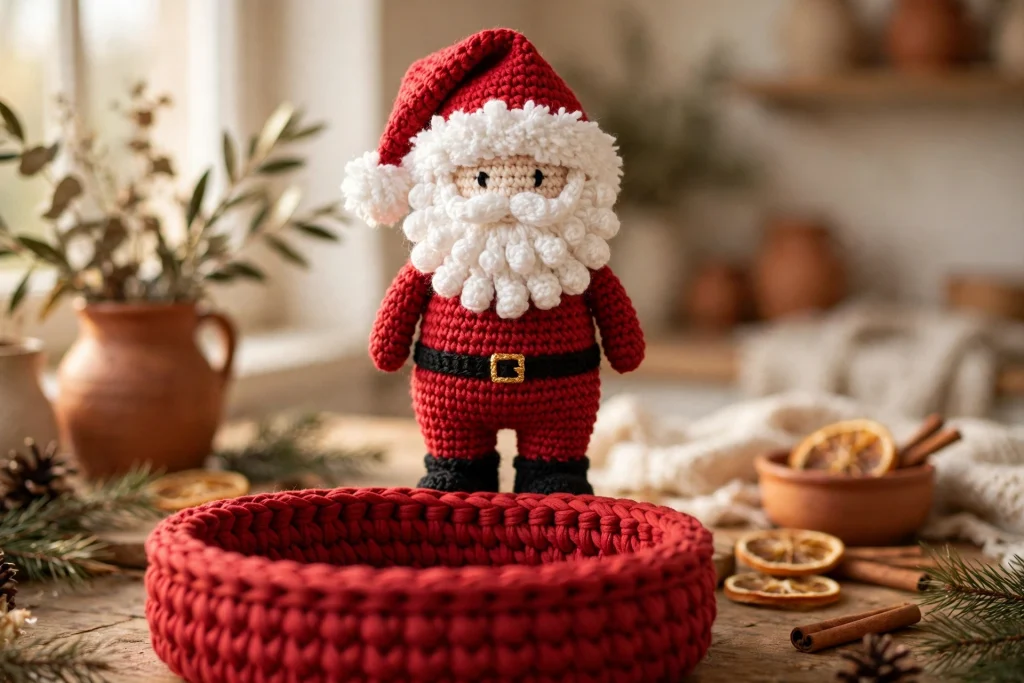
Using a different yarn? Worked in worsted (aran) yarn with a 4 mm hook, the same stitch counts give a set roughly 12–15% larger (coasters approx. 13 cm across, Santa approx. 24 cm tall). The counts do not change — just measure each piece at its checkpoint and allow extra yarn in every colour.
Care, and a last safety note
Spot-clean with a cool damp cloth, or hand-wash gently in cool water with a mild detergent. Roll in a towel to remove water, reshape, and dry flat away from direct heat and sunlight. Do not tumble dry — just fluff the beard and trims with your fingers once dry. And the safety note from the materials list bears repeating: this set is a decoration, not a toy. Small parts can be a choking risk, so keep it away from babies, young children and pets, and inspect the knots and attachments now and then through the season.
Your turn
New to pattern posts? Start with our easy crochet dishcloth pattern to get comfortable with counting rounds, then come back to Santa — the coasters use exactly the same disc skills. You will find every pattern we publish in our Crochet Patterns collection.
📌 Save this post on Pinterest so the pattern is easy to find when your yarn arrives — and if your Santa takes his place on your Christmas table, we would love to hear about it in the comments.